how to create roof by face in revit | Complex roof by mass face
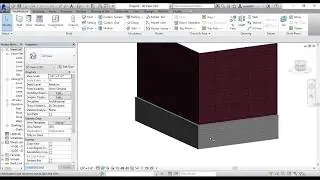
Create roofs on any non-vertical faces of a mass using the Roof by Face tool.
You cannot select faces from different masses for the same roof.
Note: Roofs created using the Roof by Face tool do not automatically update if you change the mass face.
To create a roof from mass faces
Open a view that displays the mass.
Click Massing & Site tabModel by Face panel (Roof by Face).
In the Type Selector, select a roof type.
(Optional) On the Options Bar, specify the level of the roof.
(Optional) To create the roof from a single mass face, click Modify | Place Roof by Face tab multiple Selection panel (Select Multiple) to disable it. (It is enabled by default.)
Move the cursor to highlight a face.
Click to select the face.
If the Select Multiple options are cleared, a roof is placed on the face immediately.
Tip: You can change the pick face location of the roof (either top or bottom) by modifying the roof’s Picked Faces Location property in the Properties palette.
If Select Multiple is enabled, select more mass faces as follows:
Click an unselected face to add it to the selection. Click a selected face to remove it.
The cursor indicates whether you are adding (+) or removing (–) a face.
To clear the selection and start over, click Modify | Place Roof by Face tab multiple Selection panel (Clear Selection).
When the desired faces are selected, click Modify | Place Roof by Face tab multiple Selection panel creates Roof.
Tips
Do not select upward-pointing and downward-pointing faces for the same roof.
To make roof panels that cover both upward and downward faces, split the mass into 2 faces so that each face is either completely upward or downward. Then create one or more roofs from the downward faces and one or more from the upward faces.