VHS Video Converter to Computer : Steps to Convert VHS Tapes to Digital Quickly and Affordably
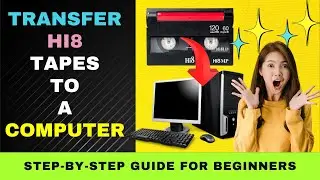
This video explains how a VHS video converter to a computer works. It also explores the topic of VHS video converter to digital and how to convert VHS to MP4.
Here's a step-by-step guide on how to use a VHS video converter to a computer.
00:00 VHS video converter to computer
00:23 Tools needed to convert VHS to digital
02:01 Setting up your equipment
02:41 Starting the capture process
03:02 Editing the captured video
03:17 Solving capture-related problems
A VHS video converter turns video footage from a VHS tape to a digital file through a computer.
Here are the tools you'll need for the conversion process.
The first and most important tool you would need is a VCR. Make sure your VCR is working and it has the necessary output ports. This would usually be composite video and audio.
Alternatively, if you have a VHS video camera, you can use it, too. The camera will serve as a video player.
Next, you would need your VHS tapes. You also need to make sure that the tapes are in good condition. You've to ensure that there's no mold attack on the tape.
If your tape is moldy, you need to get it cleaned first. Otherwise it would affect picture quality and even your VCR heads.
Remember, record only the content you own. Copyrighted material like movies should not be copied without permission.
Next, you would need a VHS video converter. You can get a VHS video converter for cheap. Such a converter can easily plug into your computer USB port.
The converter will receive the analog video signal to digital before sending it to the computer to be captured.
Some of these converters will work with a PC or Mac and even tablets. Choose the one that fits your requirements and budget.
If you can't find a VHS converter in your neighborhood, shop for one online.
Next, you would need a computer. This wouldn't be a problem for most of you. If you have a newer computer, it should be fast enough to handle the conversion process.
You would also need enough hard disk space in your computer to store the captured video.
Then you would need AV cables to connect your VCR to the capture card.
Next, you would need video capture software installed in your computer.
This software program is usually bundled with the video capture card. So, you don't have to worry about purchasing it.
Now that you have the necessary tools, you're ready to set up your equipment.
The steps will be provided in the video capture manual. However, here's a quick guide.
First, connect your VCR to the video capture card. This would be a straightforward process. Connect the yellow cable to the yellow port on your VCR and the capture card. Do the same for the red and white cables.
Next, connect your video capture card to your computer through a spare USB port.
Then install the software that came with the video capture device.
You can then set up the software. Choose your capture settings. Your best bet would be to capture in the MP4 format. This will ensure your video plays in most digital media devices.
Next, insert your tape into the VCR and hit the Play button.
You should see a preview of the video on the video capture software screen.
When you're ready, hit the record button on the video capture software.
Be around to monitor the progress of the recording.
Stop the recording when the tape comes to an end or when you've reached a desired point.
The captured video will be stored in the folder you selected.
You can now proceed to edit the video. Most video capture software programs come with a basic video editor.
You can trim, add titles and transitions among others.
After editing your video, you can now share the precious memories with your friends and family.
If you run into any problems during the video capture process, consult the video capture device manual.
Good luck with capturing your VHS footage on your computer.
It's hoped that you've obtained the necessary knowledge to under how a VHS video converter to a computer works.

