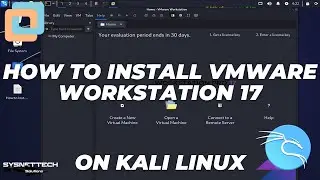
How to Install VMware vSphere Hypervisor ESXi 8.0 on VMware Workstation 17 | Quick Install Guide!
In this video guide, you'll learn super simple steps to install VMware vSphere Hypervisor ESXi 8.0 (8.0b) on a new virtual machine using VMware Workstation 17 Pro on a Windows 11 PC. The guide will walk you through everything, from making a new virtual machine to setting up the ESXi 8.0b hypervisor. Just follow the steps closely, and you'll easily install and run the hypervisor, using it to create and manage virtual machines as you want.
✅ S U B S C R I B E ► http://goo.gl/8d0iG9
✅ Article ► https://www.sysnettechsolutions.com/e...
Creating a New Virtual Machine: 0:00
Installing ESXi on the Virtual Machine: 1:40
Connecting to ESXi Server: 12:15
Creating a New Datastore: 13:05
Here are the steps to create a new virtual machine using VMware Workstation software and install VMware ESXi 7 and later on.
1. To begin, launch your VMware Workstation software and click on the Create a new VM option.
2. A New Virtual Machine Wizard will appear, where you should select the Custom (Advanced) option.
3. In the Hardware Compatibility window, choose version 17.
4. In the Guest Operating System Installation window, select the option that says I will install the operating system later.
5. In the Select a Guest Operating System window, choose VMware ESX, and then select VMware ESXi 7 and later from the Version section.
6. In the Name the VM window, type in a name for the virtual machine and configure the installation location.
7. In the Processor Configuration setting, make sure to configure at least one CPU (processor) and eight cores.
8. In the Memory for the Virtual Machine setting, set the memory size to 8 GB or higher than what your computer supports.
9. For the Network Type, select NAT.
10. In the I/O Controller setting, select Paravirtualized SCSI.
11. For the Disk Type, select either SCSI or NVMe.
12. In the Disk setting, create a new virtual disk.
13. Set the disk capacity to 40 GB and backup the disk file as a single file.
14. Keep the location and name of the disk file as it is.
15. In the virtual machine summary window, click on Customize Hardware.
16. Click on the CPU device and tick all the options under the Virtualization Engine.
17. Click on the CD/DVD virtual device and add the vSphere ESXi ISO file that you previously downloaded to your PC in the Use ISO Image File section.
18. Close the settings of the virtual server and run it.
19. Finally, follow a video tutorial to install ESXi on the VMware virtual machine, and you're all set.
───────────────RELATED VIDEOS───────────────
➊ How to Create a Virtual Machine with ESXi
➦ • How to Create Virtual Machine for VMw...
➋ How to Create a New Virtual System
➦ • How to Create New Virtual Machine in ...
➌ How to Add ISO Files to Datastore
➦ • How to Add ISO Files to Datastore in ...
➍ How to Install Windows 10
➦ • How to Install Windows 10 on VMware v...
➎ How to Install Ubuntu
➦ • How to Install Ubuntu on VMware vSphe...
───────────────FOLLOW US───────────────────
✔ Facebook
➦ / sysnettechsolutions
✔ Twitter
➦ / sysnettechs
✔ Pinterest
➦ / sysnettechs
✔ Instagram
➦ / sysnettech_solutions
✔ LinkedIn
➦ / tolqabaqci
███████████████████████████████████████████