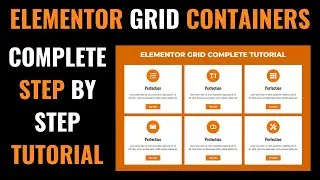
How to make Beautiful HERO + HEADER section using ELEMENTOR FLEXBOX CONTAINER 2023
Sure! Elementor is a popular page builder plugin for WordPress that allows you to create custom designs and layouts easily. Using Elementor's Flexbox container feature, you can create flexible and responsive layouts for your website. Here's a step-by-step guide on how to do it:
Step 1: Install Elementor Plugin
If you haven't already, install and activate the Elementor plugin from the WordPress plugin repository. You can do this by going to your WordPress dashboard, navigating to "Plugins" - "Add New," and searching for "Elementor." Install and activate the plugin.
Step 2: Create a New Page or Edit Existing Page
Go to "Pages" in your WordPress dashboard and either create a new page or edit an existing one where you want to design your layout using Elementor.
Step 3: Access Elementor Page Builder
Click on the "Edit with Elementor" button to access the Elementor page builder for the page you want to design.
Step 4: Add a Section
Once you're inside the Elementor editor, you'll see a canvas with a '+' icon on it. Click on the '+' icon to add a new section to your page. A popup will appear, and you can choose the number of columns you want in your section. For a basic example, choose "1 column" to start.
Step 5: Add a Flexbox Container
After adding a section, click on the grayed-out icon in the middle of the section (the middle handle). This will open the section settings panel on the left-hand side.
In the section settings panel, go to the "Layout" tab and change the "Layout" option to "Flexbox."
Step 6: Add Widgets to the Flexbox Container
Now that you have a Flexbox container, you can start adding widgets (elements) to it. Click on the "Add New Widget" button (the '+' icon) inside the Flexbox container to add any widget you want, such as images, text, buttons, etc.
Step 7: Customize Flexbox Container and Widgets
With the widgets inside the Flexbox container, you can now customize them using Elementor's various options available on the left-hand side settings panel. You can change the content, styling, and layout of each widget.
Step 8: Adjust Flexbox Container Settings
Back in the section settings panel on the left-hand side, you can adjust the Flexbox container's alignment, justify content, and other Flexbox-related properties. These settings will control how the widgets inside the container are arranged.
Step 9: Preview and Save
After you've designed your layout using the Flexbox container and added widgets, you can preview your changes by clicking the "Preview" button. If you're satisfied with your design, click the "Update" button to save the changes to your page.
Step 10: Repeat or Add More Sections (Optional)
If you want to create a more complex layout, you can repeat the process of adding sections and Flexbox containers to your page. This way, you can create a multi-column or multi-row layout as per your requirements.
That's it! You've now learned how to make a design or layout using Elementor's Flexbox container in WordPress. Remember that Elementor provides various other advanced features, such as animations, responsive settings, and more, to enhance your designs even further.
#elementor #wordpress #webdesign #webdevelopment