Photographing the 2020 Great Conjunction of Jupiter and Saturn (Revised)
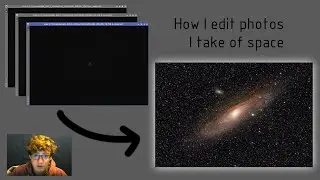
FYI, video compression is horrible, so images don't look so good. If you are interested, you can view the photos here: https://www.icloud.com/sharedalbum/#B...
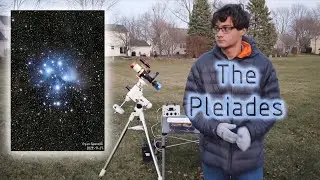
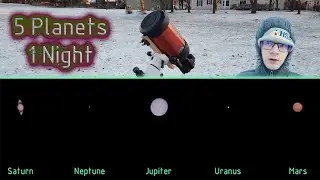
After a second night of imaging on the 22nd, we have produced a MUCH better photo than last time, you can’t even compare them. The Great Conjunction of Jupiter and Saturn occurs every 20 years but this year they are exceptionally close. So close that we can get them in the same field of view at high magnification. The 21st is the closest they will get but a day or two before and after is fine as well. The first half of the video is from 12/20 but the second half with the processing is with data gathered from 12/22. This video shows our whole process to how we took the image.
_________________________________________________________________________________________________
In Depth Explanation of Image Capture and Processing:
(frame, image, picture, photo all mean the same thing)
0:00 - Equipment
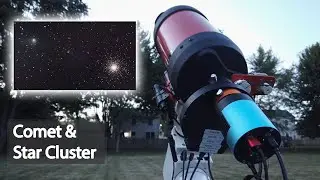
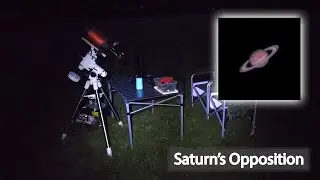
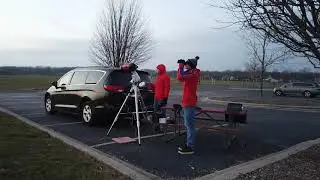
Ok, first off is the equipment. Our mount is the Skywatcher HEQ5 German equatorial mount. The telescope is the Celestron 6SE Schmidt-Cassegrain Telescope (SCT) which has 1500mm of focal length and 150mm of aperture (f/10). The camera is a Canon Rebel T3i (600D) which we have modified by removing the IR filter. Also we used a 2x Barlow lens and that effectively doubles your focal length which means a more magnified image. The mount and camera are both connected to a laptop which enables us to control both from the computer.
1:15 - Setup
Next part is the alignment, focus, and framing of the telescope. The equatorial mount needs its polar axis to be aligned to the Polaris, the north star (assuming you are in the northern hemisphere). In our case, Polaris was obscured by clouds so we pointed it true north according to our compass and adjusted the altitude according to our latitude. This enables the mount to accurately track the night sky to counteract the apparent rotation of the sky caused by the rotation of the Earth. The next step is to make sure the red dot finder scope on the telescope is accurately aligned by pointing at a street light or something similar. Once that is all good we point the finder scope at the target, in this case Jupiter. Now we adjust the telescope's focus until it appears on the camera.
2:58 - Image Capture
The software we use is called APT (astrophotography tool). It has a planetary feature that will basically record the live view from the camera. However, it will produce a much better quality image if you are zoomed in by 5x because that puts the pixels in 1:1 scale. I'm not going to pretend I know what that means because I don't. All I need to know is that it works. So knowing this, our plan was to separately record 5000 frames zoomed in on Jupiter and the same for Saturn. Then we would take some longer exposure images to capture Jupiter's moons, about 1/4 second. We also took about 1500 frames without zooming in, so with both Jupiter and Saturn in frame but they were pretty useless except for using as a template which I will get too in the next part.
4:08 - Post-Processing
Last but not least, post-processing. The programs used were Autostackkert!, Registax, and Photoshop. The first step was to stack the 5000 frames of Jupiter and the 5000 frames of Saturn in Autostackkert. So what the program does is first it analyzes each frame and ranks them based on their quality. Then based on the quality graph it gives back, I select the percentage of frames I want to be stacked. For Saturn I chose the best 1000 frames because the quality graph was mediocre, but for Jupiter I stacked the best 4500 frames because the quality graph was really solid. Then the program will align all the images and sort of mesh them into one so that any noise is removed and the real signal is brought forward. After that I also stacked the best 12 images of Jupiter with its moons following the same process. The next step was to sharpen the stacked image of Jupiter and Saturn in Registax. I'm not quite sure how it works but I think the main principle is boosting contrast to improve detail. For me, its just adjusting the sliders until it looks good. I sharpened the stacked image of Jupiter's moons in photoshop by making the moons smaller and decreasing the saturation. Now for the final part, combining it all together. I used one of the 1500 frames of Jupiter and Saturn that I mentioned earlier to use as a template for positioning Jupiter and Saturn. Then I inserted the sharpened pictures of Jupiter, Saturn and Jupiter's moons and positioned them according to the template image. Then I erased the background of each of them and cleaned up the background of the template image by using the stamp tool and decreasing the saturation. If you made it to the end of the description, good job. I almost used up the 5000 character limit.

![Я НИКОГДА НЕ: СПАЛ С ТАРЕЛКОЙ! [TarelkO & Лесли & Rimus]](https://images.mixrolikus.cc/video/MAH8ko9WvoA)