Step-by-Step Tutorial for Making a Laser Cut Craft Booth Display
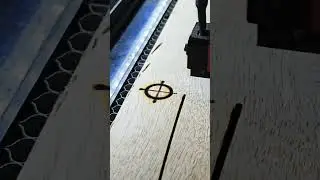
In this tutorial, we show you how to make a stylish and easy-to-assemble standing display for your crafts using laser-cut maple plywood. With just one sheet of 1/2" maple plywood and a 1" dowel rod, we created a functional and eye-catching booth display that's perfect for craft shows or markets. We used the Print and Cut feature in Lightburn laser software and registration marks to ensure precise cuts and easy assembly. The pass-through slots in our 100 watt laser allowed us to cut all the pieces out of one sheet of plywood. We also added shelves to the design to display more of our crafts. Follow along with us as we take you step-by-step through the process of making this DIY craft booth standing display. Don't forget to check out our website kandgmakeit.com for more great DIY ideas!
Stuff We Used:
Portable Wooden Standing Display: https://kandgmakeit.com/collections/c...
https://www.amazon.com/shop/kimandgar...
Follow us on social:
Patreon: https://www.patreon.com/user?u=16643484
Instagram: / kandgmakeit
Facebook: / kandgmakeit
We love to Do It Ourselves. You love to Do It Yourself. Let's Do It Together. New DIY Videos Every Week!
Visit our website:
https://www.kandgmakeit.com/
FYI: We are not professionals, and we don’t claim to be. This is what we found worked for our project. Yours may need a little different approach. We have just enough woodworking skill to make some basic furniture. Safety first!
FTC Disclaimer: This is not a sponsored video. All opinions are genuinely our own. This post may contain affiliate links and we earn a small commission if you make a purchase after clicking on my links. It doesn't cost you any extra. Thank you for your continued support to keep Making It!