Best OBS Studio Settings, Part 1 - Bitrate, Twitch Server, and Stream Key | Tutorial 4/13
Learn the best settings for OBS Studio and Twitch. We cover options such as how to select a proper bitrate, which Twitch server you should choose, and how to get your stream key.
Next Video .....► https://goo.gl/zjhrYy
Previous Video .....► https://goo.gl/Y0fCdE
Bandwidth Test Tool .....► http://goo.gl/tKDCsZ
~
FREE DOWNLOADS
Get the files used in our videos here .....► http://goo.gl/Fl4Isp
~
OBS Studio Download Link: https://goo.gl/71XhD7
View the guide on our website: http://goo.gl/0vUQGY
Ending Track: https://goo.gl/UKpjkB
~
Support me at / nerdordie
Check out http://NerdOrDie.com
Follow Nerd or Die on Twitter / nerdspwn
Watch the Nerd or Die Live Stream / nerdordie
-----
TRANSCRIPT EXCERPT
Hey everyone in this video we’re going to talk about the best settings that you can set up, in OBS Studio. Now, The first thing that I want to mention is that settings will vary from person to person - but I’ll guide you through how to make the right choices for your stream. Before we start I want to mention that I will be explaining steps to follow in detail, and while it might seem a bit tedious at first, I promise that it will save you a lot of headache in the future.
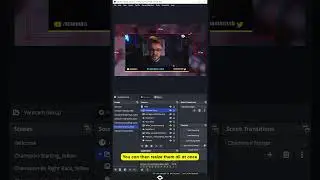
With OBS Studio open let’s hit the ‘settings’ button. The first thing we’re going to look at is the general tab. Here, we can choose our default language as well as pick a light or dark theme. I personally prefer the dark theme, but choose what you like. Next, the “Show confirmation dialog” check boxes will give you a pop up box when you decide to hit start or stop stream. If you’re concerned about accidently going live or stopping your stream prematurely, then select these boxes. Let’s hit apply and move on.
The stream tab is where we’ll need to make a few important decisions. First, we will notice the ‘Services’ selection is defaulted to Twitch. However, you can see a list of other platforms we can stream to with OBS studio. One of the more important options in the settings is selecting the proper Twitch server. If you’d like, you can select the server that is closest to you. But, I recommend downloading a tool that we can use to get the best results.
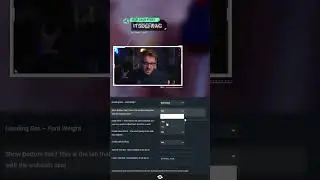
The Twitch Bandwidth Test Tool is extremely useful. To let you know, I actually misunderstood how to choose the best server in my previous videos. The best option is not always the closest server to you, which is why I use this program. We will use this to determine our best server, as well as what bitrate to use in a little bit. The link for download is in the description below. If you’re uncomfortable downloading any tools, I’ll describe another way to determine bitrate later in this video. Once the tool is downloaded, you’ll need to extract it with a program like WinRar. I actually leave mine on my desktop, but you can put it wherever you’d like.
Once we run the test tool we’ll see a couple of options. First, we need to acquire our stream key. Click the “Get Key” link and it will open your Twitch Dashboard if you’re already logged in. If not log in. If you’re not using the test tool, you can get to the Twitch Dashboard by going to twitch.tv/broadcast/dashboard and logging in. Make sure you’re on the Stream Key tab and click “Show Key”. You’ll get a warning that tells you to not share this key with anyone. Raed through it and click “I Understand”. After that you’ll see your key, as well as a link that allows us to reset our key if we accidently show ours somehow. Copy your key and go back to the Test Tool and paste it into the Stream Key box. Next, the test duraction option will allow us to choose a time to test for. You can leave it on automatic, which does about 10 seconds of testing per server, but if you have the time, it’s better to let it run longer, to give you a more accurate results. Finally, select the region you’d like to test - I’m going to only check the United States.
Now, just hit start and go grab a snack or maybe even take a nap. But, once the test is done you’ll see some numbers for each server. We want to choose the server with the highest bandwidth with a quality above 80. The RTT time represents the latency to the server, but isn’t the most important factor. The test caps the speed at 10,000kbs, but we’ll discuss that in a bit, make sure to leave this tool open. Based on my results, I’m going to tab back to OBS and choose the Dallas, TX server. If you’re not using the test tool, then it’s typically best to choose the server closest to you - but again, the tool will give you the best results. I’m also going to paste my stream key into OBS since I still have it copied to my clipboard. But if you don’t have yours copied anymore, go back to twitch.tv/broadcast/dashboard to get your key and enter it here. Hit apply and let’s check out the next tab.