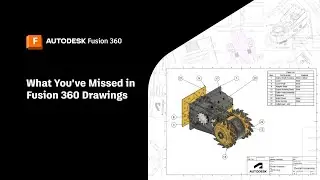
Hole Tables in Fusion 360 Drawings Workspace | Autodesk Fusion 360
The Autodesk Fusion 360 team is happy to announce that Hole Tables are available in the Drawings workspace! In this Fusion 360 YouTube video, Clint Brown is going to explain everything there is to know about hole tables.
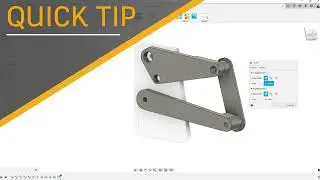
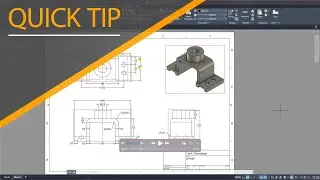
If we go over to our tables drop-down menu and choose “hole table,” all we need to do is select an origin, and place our table. You can adjust the size of hole tables like any other table in Fusion 360. Also, clicking on the table itself will allow you to choose which columns you'd like. You can choose your direction and choose to arrange tags by either size or position. You can also rename your hole table. One feature of hole tables that we particularly appreciate is that they understand ordinate dimensions. Hole tags can be moved individually or, by box-selecting, you can move multiple whole tags at once. If you end up with a very long hole table, clicking on the triangle will allow you to split the table, making it shorter and easier to fit on your drawing.
Need more help on transitioning to Autodesk Fusion? Click here: https://autode.sk/3zSETKO
►FREE TRIAL | https://autode.sk/31Sxeef
►SUBSCRIBE | https://autode.sk/30njGGX
►GET STARTED | https://autode.sk/30k2DWh
CONNECT with Fusion 360 on social media:
INSTAGRAM | https://autode.sk/2Enzh8P
FACEBOOK | http://autode.sk/19jII5A
TWITTER | http://autode.sk/19jIJXc
LISTEN to the Fusion 360 podcast "The New Possible":
BLOG | http://autode.sk/3qbFsFS
SPOTIFY | http://autode.sk/3txPz9O
APPLE | http://autode.sk/36LwBTE
GOOGLE | http://autode.sk/2YQccbC