Discord Overview and Setup - Creating a Server and User Settings
Join Nerd or Die's Discord server: / discord
Discord is an all-in-one voice and text chat for gamers that's completely free. We'll go through a quick overview of the app, and have a tutorial on server setup, as well as your user settings!
Get Discord: https://discordapp.com/
~
Support me at / nerdordie
Check out http://NerdOrDie.com
Follow Nerd or Die on Twitter / nerdspwn
Watch the Nerd or Die Live Stream / nerdordie
-----
VIDEO TRANSCRIPT EXCERPT
Hey everyone, in this video I’d like to introduce you to Discord, a free all-in-one voice and text chat, designed for gamers. Let’s get right into it.
I want to take a bit of time and show everyone what is quickly becoming one of my favorite new apps. If you haven’t heard of Discord yet, it’s basically Skype, Teamspeak, and Slack combined - but it’s designed with gamers in mind. This video will have a quick overview and initial setup of the app, how to setup your own server and manage permissions, and finally how to join channels and manage some of your user settings.
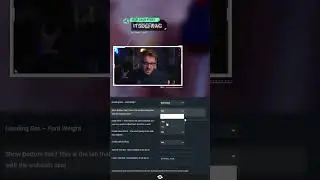
To start with, let’s head over to DiscordApp.com - one of the first things you’ll notice is the Open Discord button, this will actually open the app in your browser, but let’s not worry about that just yet. We can scroll down and see a list of all the features the app promotes, including DDoS protection, for all you streamers out there, minimal CPU usage, which I can say after using this for a while that this app is extremely quick and light on resources, and the ability to manage permissions, perfect for any guilds or groups of gamers.
I recommend checking out the rest of the website, because there are a lot of awesome things you can do with this app, such as using slash commands to post game results and dps meters, but let’s actually hop into how to set up the app.
All you need to do is click “Open Discord”, register in about 10 seconds, and that’s it. You’ll be prompted with a walkthrough of the features, which I definitely recommend taking the time to check out, but for now I’m going to skip it. The app runs in your browser, but it also has an independent app that you can download. While the browser app is quick and works very well, it’s a bit limited, so I’m going to set up the full app. Currently it’s available for Mac OSX, PC, Apple IOS, and Android - with linux coming soon. And just by the way, the mobile app is pretty awesome - so if you have a smart phone, check it out.
Once you’ve downloaded the full app, launch it and log in. Let’s go ahead and set up a server - you might be already prompted with an option to create a server or join one, but since I already logged in, I’m going to simply click the plus in the top left, and hit “Create a server” - I’m going to name mine “Nerd Or Die - Test” and pop in an icon I’d like to use for the server, then select my region of US East. After I hit create… that’s it, we’re ready to rock.
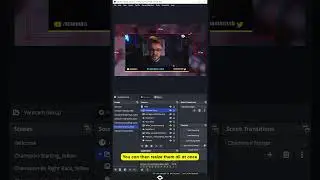
If you’d like, you can click the instant invite button, tweet or copy the link, and share it with anyone you’d like to have access to your server. Let’s check out some of the server settings before we continue. Click the menu icon next to your server name and hit Server Settings. Here we can see our general server settings/ The overview gives us a quick glance at our server info, plus the ability to select an AFK channel. Instant invites shows us the codes for any of our invite links plus the ability to revoke access to them. Members will allow us to see anyone invited to the server, which will allow us to kick or ban users, or apply roles, such as guild leader, etc. - you can also prune, or remove any inactive members.